使用 VMware 安装 Android
原文 Installing Android on VMware ESXi: A How-To Guide
下载 ISO 镜像
访问 Download File List - Android-x86 - OSDN 下载 Android x86 架构的镜像.
Create
选择Linux虚拟机, 内核选择 Other 3.x or later Linux(64-bit)
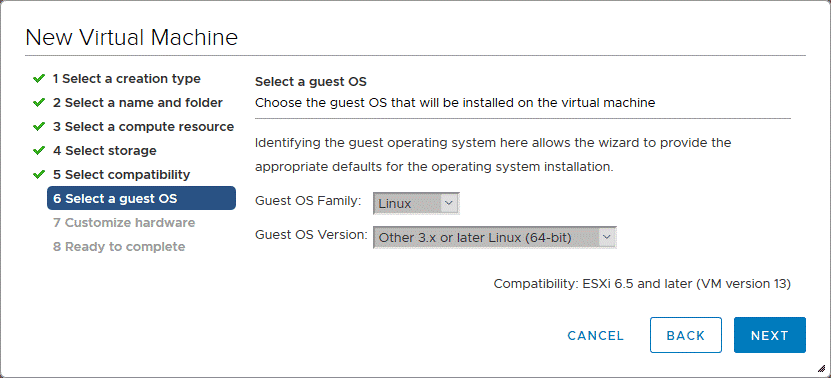
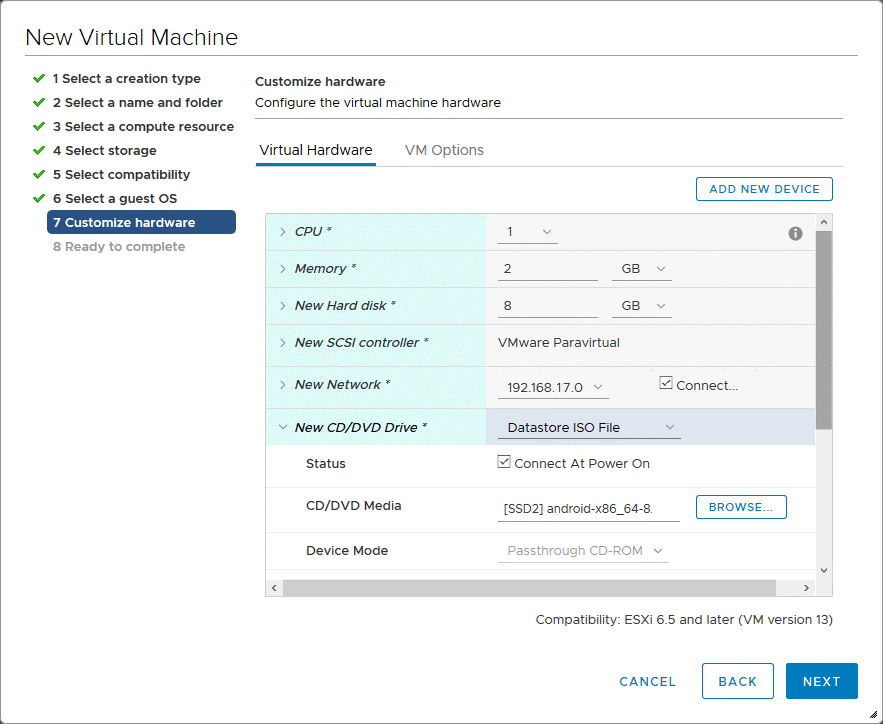
配置根据需要设置, 比如 8GB 内存 + 8GB 硬盘
Install Android on VMware ESXi
After creating a new virtual machine, power on the VM and boot from the virtual ISO image (android-x86_64-8.1-r3.iso) you selected to use by a virtual CD/DVD drive during the Android VMware VM creation.
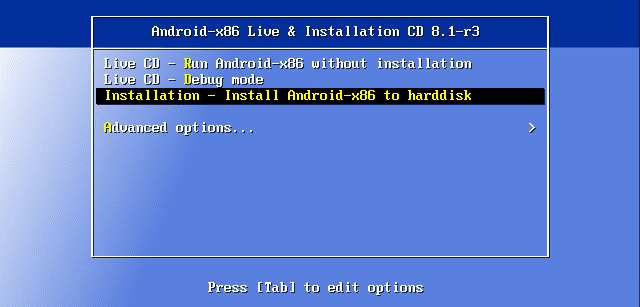
Once the VM has booted from a virtual DVD disk, on the boot screen, select the third option with the arrow keys: Installation – Install Android-x86 to harddisk. Then press Enter to boot.
Choose Partition. When the Android installer is loaded, on the Choose Partition screen select Create/Modify partitions and hit OK.

Confirm. Select No when you see the "Do you want to use GPT?" question.

The cfdisk utility is now opened. Select New to create a new disk partition.

Select Primary to create a primary partition.

Set all available space of the 8-GB virtual disk to be used as a partition to install Android on VMware.

After creating a new partition, make the partition bootable. Select the partition, navigate to the **Bootable*8 option, and press Enter.

When the Boot flag is set for the partition, write changes to the disk. Navigate to the Write option and press Enter. After that, you will see the question: Are you sure you want to write the partition table to disk? (yes or no)
Type yes and press Enter.

Now the partition has been created. You can quit the cfdisk by selecting the Quit option.

Now on the Choose Partition screen, you can see the created 8-GB partition. Select this partition and hit OK to continue.

Choose filesystem. Select ext4 as a filesystem to format the sda1 partition created during the previous step.

Confirm. Select Yes to confirm that you want to format the sda1 partition.

Do you want to install boot loader GRUB? Hit Yes.

When you see the next question (Do you want to install /system directory as read-write?), select Yes.

Congratulations! Android-x86 is installed successfully. Hit OK to reboot the machine.
Once the Android VMware VM has been rebooted, you will see the GRUB boot menu displayed. If you do nothing, the first (highlighted) boot option automatically gets selected, but Android won’t boot correctly. You should be able to see only the command prompt.
In order to fix this issue, select the first boot option and press e to edit the boot commands before booting.

After that, you can see existing boot commands in the boot sequence. Select the upper item as shown on the screenshot below and press e once more to edit the boot command for GRUB.

Edit the string and change quiet to nomodeset xforcevesa
Finally, your boot command for GRUB must be:
kernel /android-8.1-r3/kernel nomodeset xforcevesa root=/dev/ram0 androidboot.selinux=permissive SRC=/android-8.1-r3

After editing the boot command, press Esc to exit back to the boot menu. Select the first boot option that you have edited and press Enter to boot.

原文这里的, 编辑完 GRUB 启动命令之后的操作是: Esc(退出到启动菜单) > Enter(执行启动), 但是实际我这么操作无效, 正确应该是编辑完启动命令之后, 按 Enter, 然后就回到 boot menu(这个时候默认选中的也是刚才编辑的命令行), 然后按字母 b 按键启动 (界面底部有解释: Press 'b' to boot, 'e' to edit the selected command in the boot sequence).
Now the Android VMware VM is booted and you can see the graphical user interface of Android. Select your preferred language and hit Start. In this walkthrough, English (United States) is used.

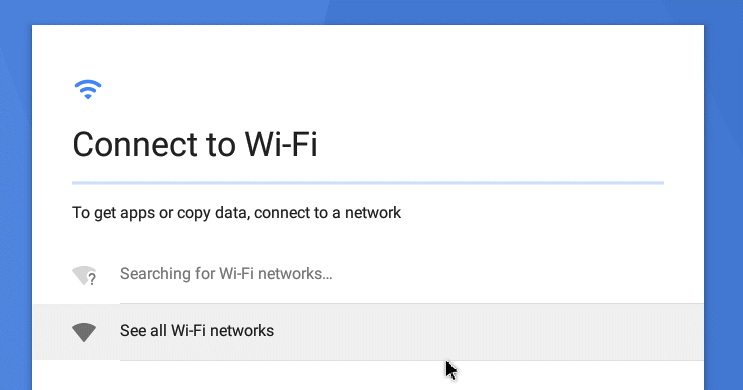
Connect to Wi-Fi. Android is intended for use on mobile devices that don’t have a RJ-45 Ethernet port and are dependent on a wireless network connection. For this reason, Android doesn’t determine wire networks. Click See all Wi-Fi networks anyway, since the network connection is essential for the majority of applications developed for Android.
Edit GRUB Configuration
As you recall, we have edited GRUB configuration to boot the Android VMware VM. However, the edited settings are not saved after the VM reboot. Let’s make the boot loader configuration changes permanent by editing the GRUB configuration to make edited settings permanent.
After loading Android, press Alt+F1 to open the console. In the console, run the commands.
Create a directory to which a virtual disk will be mounted:
mkdir /mnt/sda
Mount the virtual disk to the created directory:
mount /dev/block/sda1 /mnt/sda
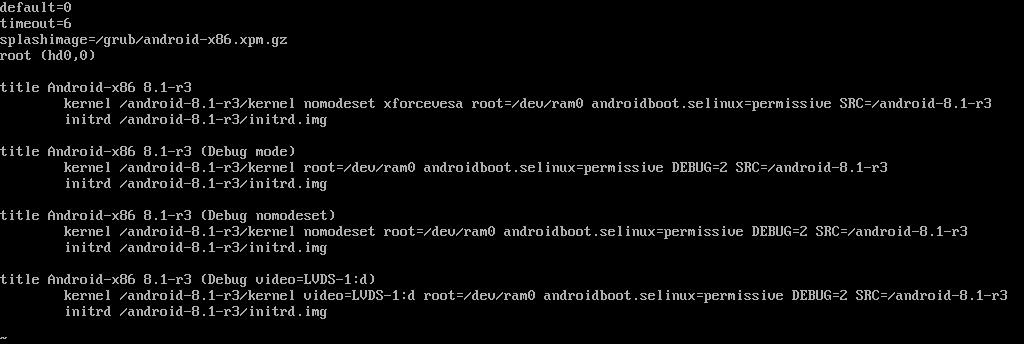
Edit the GRUB bootloader boot menu with the text editor vi:
vi /mnt/sda/grub/menu.lst
Much as you have done before, edit the first boot option and change quiet to nomodeset xforcevesa
After editing, the first boot loader option string must appear as the following:
kernel /android-8.1-r3/kernel nomodeset xforcevesa root=/dev/ram0 androidboot.selinux=permissive SRC=/android-8.1-r3
Press Esc, then type :wq to write changes to the file and quit.
After that, you can reboot the Android VMware virtual machine and Android should boot successfully without manual manipulations. Disable the sleep mode. You can configure the sleep mode by going to Setting > Display > Sleep. You can also enable graphics acceleration (Accelerate 3D graphics) in the VM settings. Notice that there are no VMware Tools compatible with the Android operating system.